NOTE: We are not yet able to build installers with a Developer ID that is recognized by GateKeeper on macOS Sierra and later OS X versions. We apologize for this and will have the problem fixed as soon as possible.
Step 1 – Download your voice package
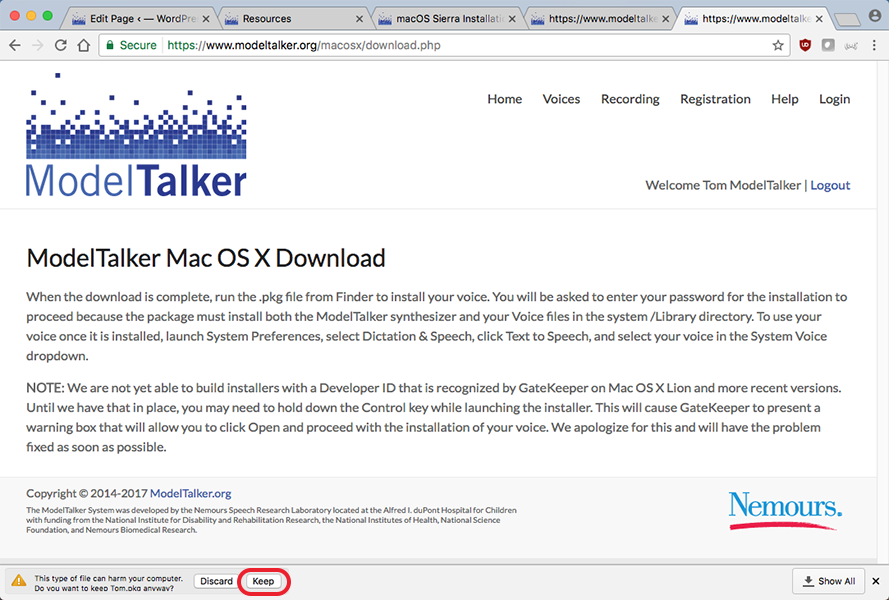
Go to the Voices menu at the top of the page and select Downloading. There you will click the link to get your completed voice. Login with your username and password if you are prompted. Scroll down to the MacOS section and click download and install the ModelTalker synthesizer package. Read and agree to the End User License Agreement to begin your download. Chrome might give you a warning that this type of file can harm your computer. Click the Keep button to save your voice package (see Figure 1 below).

Figure 1: Click Keep button in Google Chrome to save your voice package
Step 2 – Install the voice package
Do not click on the .pkg file at the bottom of the Chrome browser, but instead go to your downloads directory. Next, you will need to hold down the Control key when you click the .pkg file to launch the installer. This will cause GateKeeper to present a warning box that will allow you to click Open and proceed with the installation of your voice (see Figure 2 below). Continue to follow the steps in the installer and enter your Mac password when prompted to install the voice.

Figure 2: Hold Control key and Click the .pkg file, then click Open to install
If these instructions don’t work, you can get more help on Apple’s website at this page.
Step 3 – Enable your new voice
On your Mac, go to System Preferences and choose Accessibility. Select Speech from the menu on the left. Choose your new voice from the System Voice drop down menu (you will probably need to go into the “Customize…” submenu). Check the boxes to “Enable announcements” and to “Speak selected text when the key is pressed” (see Figure 3 below).

Figure 3: Select your voice and check boxes to enable
